Football Dip

Tuesday, January 31, 2012 1 comment
This dip isn't going to win any beauty pageants, but trust me, it's all about what's on the 'inside.'  Yum.  I've seen a few versions of this floating around the net, this is what I like.  Think queso, but easier, and....well, just yum.    With football season wrapping up, I think this is just icing on the cake....or dip on the chip for those last few games.  And without further ado...or rather, additional adjectives...
Football Dip
Ingredients
1 can of chili (15 oz), 2 pkg of cream cheese (16 oz total)-softened, 2 c. of shredded cheddar cheese, 4 green onions-chopped, 1 t. of red pepper flakes, Frito's. 
Instructions
Mix chili, cream cheese, cheddar cheese, and green onion.  Bake for 20 min in a 350 degree oven.  Sprinkle with red pepper.  Serve with tortilla chips or Frito's

Lady Bug Cake Balls

Monday, January 30, 2012 4 comments
I love cake balls.  They are really simple to put together (though the 'decorating' part can be complex), and I think they are some of the tastiest forms of cake on planet earth....and I know my way about a good cake, trust me.  I made some ladybug shaped cake balls for a lady bug themed party this past weekend...more pictures to come on a few other desserts, but....I thought I'd post these little gals along with the simple cake ball makin' steps....there are several different methods, but this is my favorite! 
Step One:  Bake up your favorite cake in a 9x13 pan following whatever directions your recipe calls for.  I baked up red velvet.  You can make homemade icing, or....just a can.  I grabbed some cream cheese frosting a la Betty Crocker this go round. 
 As soon as the cake comes out, while it' shot, grab a fork and start shredding. 
 I  mean, dig that puppy apart....
 Until you have a pile of crumbs.....unfortunately I've had a few cakes do this when I tried to remove them from the pans....if I had only known there was a way to salvage them. 
 While it's still hot dump in the icing and just stir it until it's a big gooey pile of...
 ...icing infused....
 ...cake....
 You can let it cool a bit at this point, or if you have pot holders for hands, now is the point to start rolling.  I roll the balls about an inch in diameter.
I layer them up between wax paper, and then throw them in the freezer for an hour or a month.....whatever my needs need. 
Once I'm ready to decorate, take white chocolate and melt it down at 30 second intervals between stirring.  It takes mine about 1 and 1/2 minutes. 
 While the balls are still frozen I sometimes roll them around a bit more to try to make the balls a little more perfect.  Drop them in melted chocolate. 
 I scoop them out with a fork so I can tap, tap, tap off the excess chocolate. 
I usually use a butter knife to scrap them from the fork to the wax paper to dry...which happens quickly when they are frozen. 
 Decorate and dry. 
 Bag 'em up and bring 'em to a party. 

Valentine's Day: Bear Hugs

Saturday, January 28, 2012 2 comments
I saw the idea for combining Teddy Grahams and Gummy Bears on Pinterest.  I had some left over jars from a Winnie the Pooh shower I hosted a few months back, and I decided to fill up these jars and mail them off to a few of my pint size Valentine's.  Yes, these will actually make it through the mail, just slap a few stamps on the back. 
I also bagged some up for an after school snack for a Staff Development my teammate and I had to put on....only in the teaching field, huh?  And speaking of Teddy Bears....in a little over a month I'll be posting all about the latest baby shower I'm working on with some friends with this theme in mind....can't wait! 

Chicken Enchilada Puffs

Friday, January 27, 2012 1 comment
 With the super bowl headed this way, I tried out this appetizer that I saw over at TidyMom.  This was a really easy recipe to throw together, and a different way to serve up a favorite recipe. 
Enchilada Puff Ingredients
1 pkg jumbo crescent rolls, 3 oz. cream cheese, 3/4 c. cooked chicken (shredded), 1/3 c. enchilada sauce, 2 t. taco seasing mix (I used the homemade recipe I posted yesterday). 
Enchilada Puff Instructions
1.  Preheat oven 375. 
2.  Place cream cheese and 1/2 c. cheese in the microwave for 40 seconds.  Add seasoning, sauce, chicken and mix. 
 3.  Divide onto the center of the rolls. 
 4.  Fold over and place seam side down.  Top with 1/4 c. cheese. 
 5.  Cook for 15 minutes. 

Homemade Taco Seasoning

Thursday, January 26, 2012 2 comments

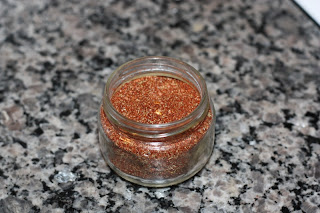
 I saw the recipe for making your own taco seasoning at smellslikehome.  I had all but one spice, so I decided to try it out.  I'm pretty sure they revoke your Texas license if the police come to your home and you aren't able to produce at least one packet of taco seasoning.  My license is safe and secure a little longer.  Since mixing this up, I can recommend the seasoning, but I do not recommend rubbing your eyes within about 27 days of making this....it might sting a little.  ;o) 
Taco Seasoning Mix
1/4 c. ancho chili powder, 1 t. garlic powder, 1 t. onion powder, 1 t. crushed red pepper flakes, 2 t. dried oregano, 2 t. paprika, 2 t. ground cumin, 3 t. sea salt, 1/2 t. black pepper
 Mix.
 Jar.  I used these instructions for making my jar a little cuter.  Cute is just an added bonus when the taco seasoning patrol swing through. 
To use: Use  2 1/2 T. of  seasoning instead of a packet of store taco seasoning. Combine 2 T. cornstarch with 1 c. water and stir to dissolve cornstarch. In a large pan set over medium-high heat, brown 1lb ground beef, turkey, or chicken.  Add seasoning mix and simmer over low heat until liquid has thickened.


Crockpot Italian Chicken

Wednesday, January 25, 2012 4 comments
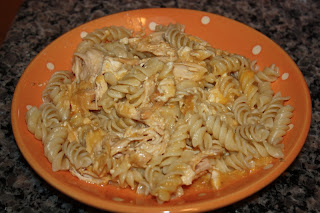
I started on a journey to use my crockpot more last year.  It was actually one of my 2011 New Year's resolutions.  There are a lot of duds out there, but this one is a keeper.  I cooked it quite awhile ago, but it'll warm your innards in the winter months.  It's super easy to throw together, and tasty. 
Crockpot Italian Chicken
Ingredients: 4 chicken breast, 1 pkg Zesty Italian Dressing seasoning, 8 oz cream cheese, 2 cans cream of chicken soup, noodles. 
Instructions:  Mix all ingredients except for the noodles.  Cook on low for 4 hours.  Add milk if it's too thick (I actually cooked it for about 9 hours b/c I was at work). 
Serve over noodles.  This safely makes 4 large servings. 

Introducing....

Tuesday, January 24, 2012 2 comments
My Goddaughter, Micah Colleen.  This blog used to be about other stuff, crafts, and other....well, whatever....who cares.  Let's just talk about Micah, the cutest little sugar booger, lady bug, punkin' face, little squishy bundle of cuteness that....OK....point made.  I heart her so stinking much.  Her mama loves the bow, so....expect lots of pink pictures and bows in the future.  On a positive note for most, a super negative note for me, she lives a thousand plus miles away, so I won't be able to take as many pictures and post about this little gal as much as I would like....though her Mama sends me daily pictures.  Anyway, to say that you'll see lots of crafts (and already have) in honor of my favorite bow head would be an understatement, but I'll leave it at this. 
Mid January I flew up to Regan's parents house in Columbia, South Carolina for Micah's Christening. 
 This is my bff, Regan.  We've been friends since 4th grade and we've made a lot of memories along the way and transitioned from friends, to family many moons ago. 
 This is the rest of the family God let me choose for myself.  I claim her Mom and dad (on the right) as my own.  They are such a blessing, I can't put the relationship into words except to say that I lost a lot as a little girl, but God had a plan for the people He placed in my life to take care of me, love me, and help me grow.  Her aunt (right about Regan) is one of Regan's godmothers, and she was married to her uncle who entered heaven a few years ago.  I had so many fun memories with the whole family, and he is greatly missed, but his spirit was present at the celebration, and I can't wait to tell Micah stories. 
 This is one of Regan's childhood friends, Liz.  She is perhaps one of the sweetest people on planet earth.  She left her twin two year olds in NC for the weekend to attend the ceremony.  She has been present at all the celebrations in the past, and I look forward to seeing her again soon. 
We spent the weekend together eating, talking, holding a very happy and laid back Micah (she doesn't get that from her mama or me), and catching up....and eating. 
 Leaving after two days was perhaps one of the hardest things I ever had to do because I had to leave a piece of my heart behind.  I don't want Micha to grow up too fast, but I've got a lot of special plans for the years to come, and some pretty fun stories to share as little nugget grows. 

Nacho Potato Soup

Monday, January 23, 2012 No comments

My extended family is really picky.  About the only thing that is safe to make isthing involving cheese....and if it also involves any sort of vegetable...it better be well hidden within that cheese.  Lauren brought this soup to work one day, and was kind enough to share the recipe via Taste of Home with me.  I tried it out with the family awhile back, and it was a huge hit, not to mention, very easy to put together!  So....if your family is like mine, or if you'd ever like to invite my family over for dinner...might I recommend this Nacho Soup?  Kinda perfect for these winter months too. 
Nacho Potato Soup
Ingredients:  1 pkg (5 1/4 oz) au gratin potato mix, 1 can (11 oz) whole kernel corn (drained), 1 can (10 oz) rotel (undrained), 2 c. water, 2 c. 2% milk, 2 c. cubed velveeta, minced fresh parsley (I omitted this, my family is frightened by green things that might contain nutrition), tortilla chips. 
Instructions:  Combine potato package, corn, tomatoes, and water.  Bring to a boil.  Reduce heat.  Simmer for 15 minutes (until potatoes are tender).  Add milk, and cheese, cook until cheese is melted.  Garnish with parsley.  Serve with tortilla chips.  I actually threw the soup in the fridge over night after I melted down the cheese, and heated it again the next day before serving with dinner.  It was great, and saved me from having to figure out timing. 

Valentine's Day: L O V E Banner

Sunday, January 22, 2012 1 comment
 I saw this banner here, it's something being sold on Etsy right now, and it's cu-ute.  I made it last spring to go with a shabby sheek/beach themed shower. 
I chopped some pennant shapes out of burlap, used my cricut to cut out letters on freezeer paper, and ironed them down. 
 I used a dabber and some white paint.  That little circle dabber saves my sanity.  I used to just use foam brushes to do this, but it's alwas seeped, the dabber....it's like the  magic wand of projects. 
The paper comes right off, and then I just hot glued these to a rope, and added those big satin ribbon (about 3 yards total).  Burlap meets satin ribbon bows-they have these sort of banners in heaven.

Valentine's Day: Cherry Salad

Saturday, January 21, 2012 1 comment
Where have I been all my life?   Last year, I had this salad for the first time.  My friend Jolene shared the 'salad' and the recipe.  I mean, when you add sweetened condensed milk to a dish and call it a salad....could a dish BE anymore up my alley? 
It's pink, so....excuse #2,345 to make this...Valentine's Day...sweet 'salads' to serve along side a romantic...or a not-so romantic dinner?  Yes, please! 
Here's the simple, and scrumptious recipe for..
Cherry Salad
Mix 1 can of cherry pie filling (21 oz), 1 large can of (20 oz) crushed pineapples (drained well), 1 can of sweetened condensed milk (14 oz), and 1 large container of whipped cream.  Optional: Chopped Walnuts and Marshmallows.  Chill and serve.